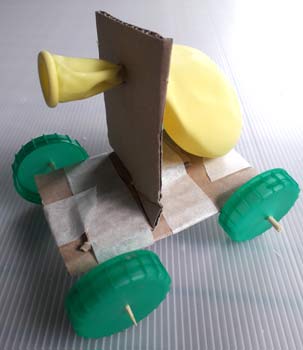
A vehicle powered by air! Blow up the balloon and hold the end shut, place the buggy on a flat surface, let go of the balloon and…… off the buggy goes. Given the right surface, these buggies can travel 10 metres or so, at a surprising speed.
Making a Balloon Buggy
This vehicle uses the same basic idea shown in Wheeled vehicle. However, we suggest you build the top structure (the bit that holds the balloon) first, and add the wheels last, as the bbq skewer axles are relatively weaker than the cardboard body. You can try building any size, but the sizes suggested here do work, so try this first.


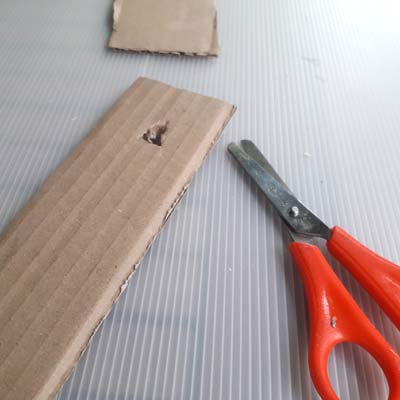
Cut two strips of cardboard 18 cm long, 6cm wide Make a hole near one end of one of the strips, using a pencil.
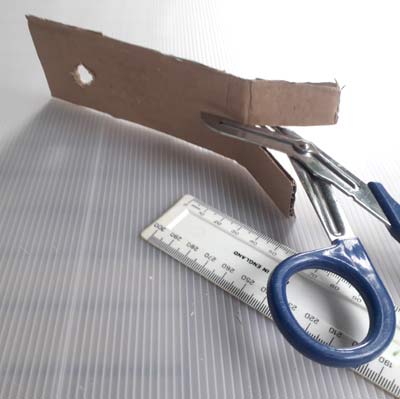
Use scissors to widen the hole until it is 1cm in diameter. Next make a vertical cut 3cm long in the middle of the end of the strip away from the hole.
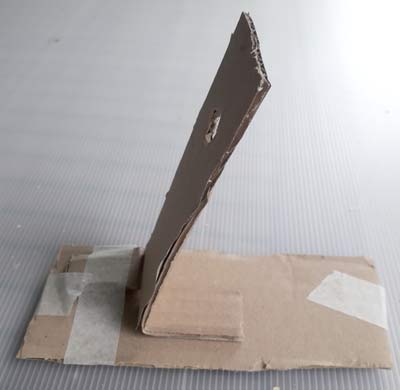
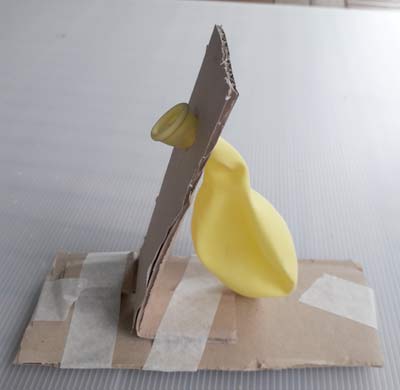
Fold one flap backwards and one flap forwards and sellotape onto the other strip of cardboard, towards one end to form an L-shaped body. (I have used masking tape instead of sellotape here, as it stands out better in the pictures). Put a balloon through the hole and make sure that you can blow it up (adult supervision needed; a pump maybe necessary for those with Latex allergies). Also make sure that the balloon deflates properly when you let go – if the hole is too small air will come out slowly and the buggy will not work.
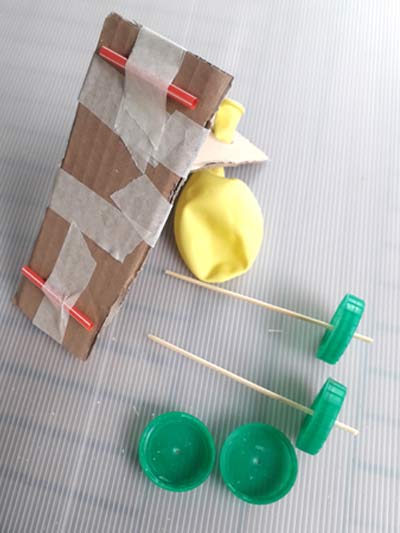

Now add straws as axle guides. Fit axles (bbq skewers) and wheels (from milk bottle tops) to the underneath of the buggy. Make the axles 8 cm or longer, so the wheels don’t touch the body. For more details on how to do this, see Wheeled vehicle
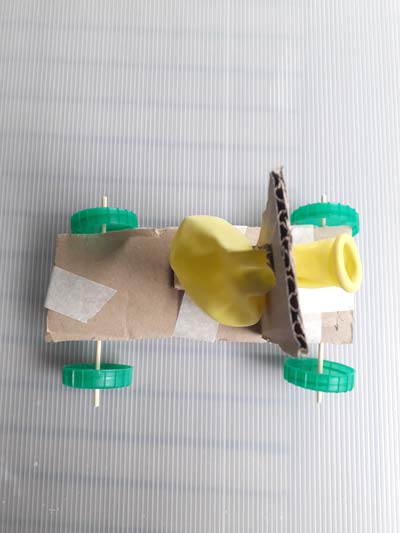

Your vehicle is now ready for testing. The buggy works because the balloon sends out a jet of air as it deflates. The force of the air moving backwards from the buggy means that the buggy is propelled forwards (This is an example of Newton’s Law that “Action and Reaction are equal and opposite). So you want the air coming from the balloon to be pointing backwards, rather than upwards or downwards – so I have added one last piece of tape in the right hand picture to ensure that the jet of air comes out parallel to the ground.
Good luck!!
